
Mastering effective video content creation for YouTube is no longer just about recording; it’s about strategizing within a rapidly evolving digital ecosystem. With YouTube Shorts dominating short-form engagement and AI tools revolutionizing scripting and post-production workflows, creators face unprecedented opportunities to captivate audiences. This comprehensive tutorial delves into the technical bedrock: from optimizing content for algorithmic visibility and maximizing audience retention through insightful analytics, to employing advanced editing techniques that elevate storytelling. You will acquire the precise expertise required to transform conceptual ideas into impactful, high-performing video content for YouTube, driving channel growth and viewer loyalty.
Planning Your Video Content Strategy
Before you even think about hitting the record button, the most crucial step in any successful video content creation tutorial for YouTube begins with thorough planning. This foundational phase dictates the direction, audience appeal. Ultimate success of your videos.
Defining Your Niche and Audience
Who are you trying to reach. What unique value will you offer them? This is the bedrock of your YouTube channel. A well-defined niche helps you stand out in a crowded space and attracts a dedicated audience. For instance, instead of “cooking videos,” consider “vegan meal prep for busy professionals” or “budget-friendly gourmet recipes for students.”
- Identify Your Passion and Expertise: What topics genuinely excite you and what do you know a lot about? Authenticity resonates.
- Research Your Audience: What are their interests, pain points. Questions? Use tools like Google Trends, YouTube search suggestions. Competitor analysis to interpret what people are looking for.
- examine Competitors: What are successful channels in your potential niche doing well? Where are the gaps you can fill?
Brainstorming Compelling Video Ideas
Once you know your niche, generating ideas becomes much easier. Think about common questions, trending topics within your niche, or unique perspectives you can offer. Consider series ideas that keep viewers coming back.
- Keyword Research: Use tools like TubeBuddy, VidIQ, or even YouTube’s search bar to find popular search terms related to your topic. Incorporating these naturally into your titles and descriptions can significantly boost discoverability.
- Problem/Solution: Many successful videos offer solutions to common problems. Think about what challenges your audience faces.
- Tutorials and How-Tos: These are evergreen content types, perfect for a detailed video content creation tutorial for YouTube.
- Lists and Top 10s: Easy to consume and highly shareable.
- Reviews and Demos: If you’re passionate about products or services in your niche.
Crafting Your Script or Outline
Whether you write a word-for-word script or a detailed outline depends on your comfort level and video style. For a comprehensive video like this video content creation tutorial for YouTube, a detailed outline or partial script is invaluable.
- Hook: Grab attention in the first 15-30 seconds. State the problem you’re solving or the value you’re offering.
- Introduction: Briefly introduce yourself and what the video will cover.
- Main Points: Break down your content into logical, digestible sections. Use bullet points or numbered lists in your outline.
- Call to Action (CTA): What do you want viewers to do next? Subscribe, like, comment, visit a website?
- Outro: A consistent closing helps brand your videos.
Here’s a simplified outline example for a tutorial video:
Video Title: Mastering Basic Video Editing for Beginners


I. Introduction (0:00-0:30)
 - Hook: "Tired of shaky, unedited footage?" - What we'll cover: Choosing software, basic cuts, adding music.
II. Choosing Your Editing Software (0:30-1:30)
 - Overview of free vs. Paid options.
III. Essential Editing Techniques (1:30-5:00)
 - Trimming clips. - Adding transitions. - Basic color correction.
IV. Adding Audio (5:00-6:30)
 - Background music. - Voiceover tips.
V. Exporting Your Video (6:30-7:00)
 - Recommended settings for YouTube.
VI. Call to Action & Outro (7:00-7:30)
 - "Subscribe for more tutorials!" - End screen elements.
Pre-Production: Setting the Stage for Success
With your plan in place, it’s time to gather your tools and prepare your filming environment. This stage is about ensuring you have the right equipment and a suitable space to produce high-quality content.
Essential Equipment for YouTube Video Creation
You don’t need to break the bank to start. Investing in a few key pieces of equipment can significantly elevate your video quality. Here’s a look at common options:
| Equipment Type | Budget-Friendly Option | Mid-Range Option | Professional Option | Notes |
|---|---|---|---|---|
| Camera | Smartphone (iPhone/Android) | Mirrorless Camera (e. G. , Sony ZV-1, Canon M50) | DSLR/Mirrorless Camera (e. G. , Sony A7III, Panasonic GH5) | Modern smartphones shoot excellent video. Upgrade for better low-light, depth of field. External mic options. |
| Microphone | Smartphone’s built-in mic (close to source) | Lavalier mic (e. G. , Rode SmartLav+), USB mic (e. G. , Blue Yeti) | Shotgun mic (e. G. , Rode VideoMic Pro), XLR condenser mic | Audio quality is often more crucial than video quality. Invest here first! |
| Lighting | Natural window light | LED panel lights (e. G. , Neewer, Godox) | Softbox kits, professional studio lights | Even, soft lighting makes a huge difference. Avoid harsh overhead lights. |
| Tripod/Stabilizer | Mini tripod, stack of books | Flexible tripod (e. G. , Joby GorillaPod), entry-level fluid head tripod | Heavy-duty fluid head tripod, gimbal stabilizer (e. G. , DJI Ronin) | Essential for stable, professional-looking shots. |
Real-world application: When I started my first YouTube channel focused on tech reviews, I used my iPhone 7 and a $20 lapel microphone from Amazon. The audio quality improved drastically. That alone made my videos feel more professional. You don’t need a fancy camera from day one.
Choosing and Preparing Your Recording Environment
Your filming location can dramatically impact the look and feel of your video. Think about background, lighting. Sound.
- Lighting: Position yourself facing a window for natural light. If using artificial lights, aim for a soft, diffused light source to minimize harsh shadows. A three-point lighting setup (key, fill. Back light) is ideal but can be simplified for beginners.
- Background: Keep it clean, uncluttered. Relevant to your content. A simple wall, a bookshelf, or a nicely decorated corner can work wonders. Avoid distracting elements.
- Soundproofing/Acoustics: Minimize echo and background noise. Record in a carpeted room, close windows and doors, turn off fans/AC. Use soft furnishings like curtains or blankets to absorb sound. A quiet environment is paramount for a clear video content creation tutorial for YouTube.
Production: Filming Your Video Content
This is where your vision starts to come to life. Good production involves more than just pointing a camera and pressing record; it’s about thoughtful execution of your plan.
Camera Techniques and Framing
How you compose your shot impacts viewer engagement and professionalism.
- Rule of Thirds: Imagine a tic-tac-toe grid over your screen. Place your subject along the lines or at their intersections for a more dynamic and visually appealing composition.
- Eye Level: Position your camera at eye level with your subject (you!) for a natural and engaging perspective.
- Headroom: Leave a small amount of space above your head. Too much looks awkward, too little feels cramped.
- Stable Shots: Always use a tripod. Shaky footage is distracting and unprofessional.
- Look into the Lens: When speaking directly to the audience, make eye contact with the camera lens. This creates a personal connection.
Mastering Audio Recording
Poor audio can ruin even the best video. Focus on clarity and consistency.
- Proximity is Key: The closer the microphone is to your mouth, the better. This reduces room echo and background noise.
- Monitor Your Audio: If your microphone has a headphone jack, listen to your audio while recording to catch issues like clipping (audio distortion) or background noise.
- Test Levels: Do a quick soundcheck before recording your main take. Aim for audio levels that peak around -6dB to -12dB on your recording device’s meter. This gives you headroom during editing.
Expert Tip: “The quality of your audio will determine the size of your audience more than the quality of your video.” – Peter McKinnon (renowned YouTuber and filmmaker). This highlights why a good microphone is a non-negotiable investment for any serious video content creation tutorial for YouTube.
Effective Lighting Setup
Lighting can transform the look of your video from amateur to professional.
- Natural Light: Position yourself facing a large window. This is the cheapest and often best light source.
-
Three-Point Lighting (Simplified):
- Key Light: The main light source, usually positioned slightly to one side of your face.
- Fill Light: A softer light on the opposite side to reduce harsh shadows from the key light. Can be a reflector or a less intense light.
- Back Light (Hair Light): Positions behind you to separate you from the background and add depth.
- Diffusion: Use softboxes or diffusion sheets over your lights to create softer, more flattering light.
On-Screen Presence and Delivery
Your energy and how you present yourself matter immensely.
- Practice: Rehearse your script or outline. Practice speaking clearly and at a moderate pace.
- Enthusiasm: Let your passion for the topic shine through. Authenticity is captivating.
- Body Language: Use natural hand gestures (if appropriate for your content). Sit or stand up straight.
- Eye Contact: As mentioned, look into the lens to connect with your audience.
- Take Breaks: Don’t try to record everything in one go. Break it down into manageable segments.
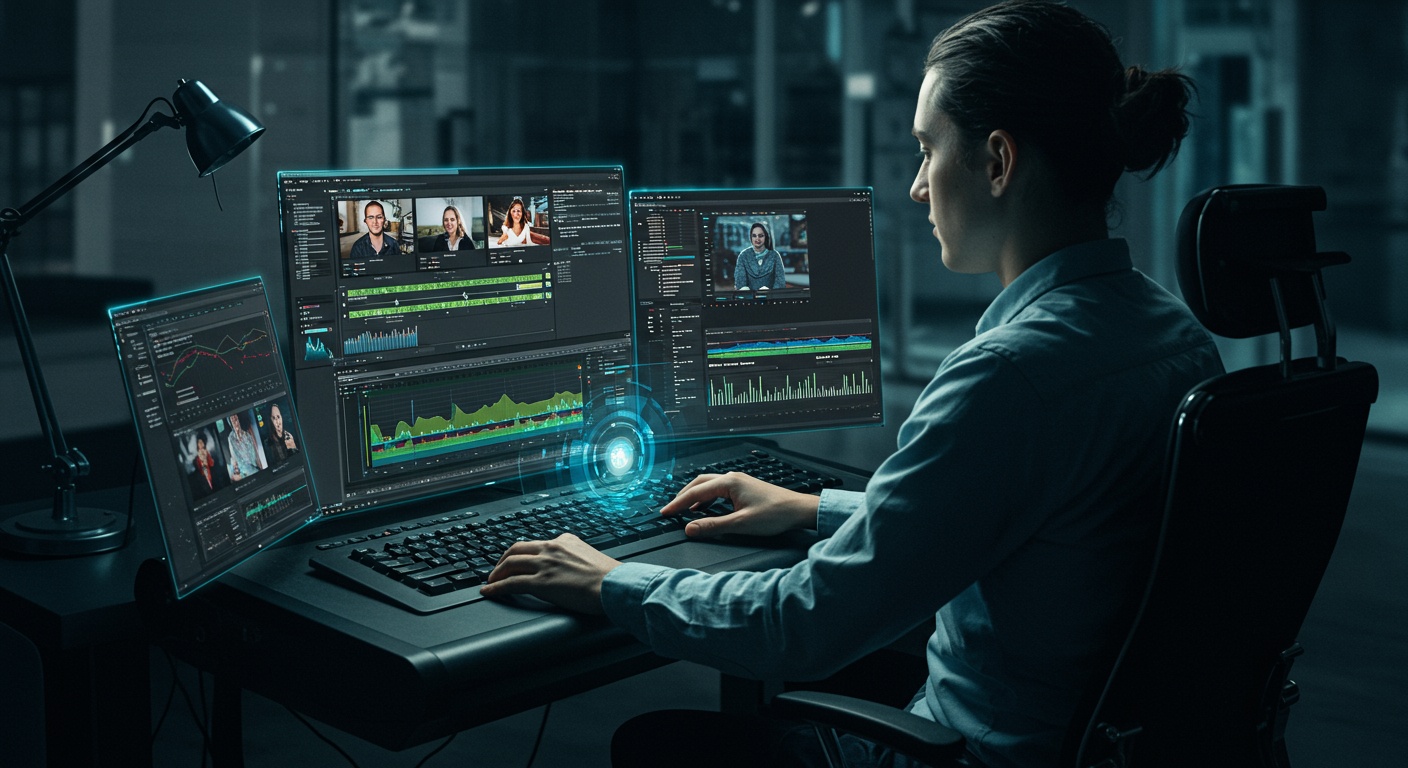
Post-Production: Editing Your Masterpiece
This is where raw footage transforms into a polished, engaging story. Editing is a critical phase in any comprehensive video content creation tutorial for YouTube.
Choosing Your Video Editing Software
The right software depends on your budget, operating system. Skill level.
| Software | Platform | Pricing | Pros | Cons | Ideal User |
|---|---|---|---|---|---|
| DaVinci Resolve | Windows, macOS, Linux | Free (feature-rich), Studio ($295 one-time) | Professional features, excellent color grading, powerful audio tools, no subscription. | Steep learning curve for beginners, hardware intensive. | Aspiring professionals, those seeking a free professional tool. |
| CapCut | Mobile (iOS, Android), Desktop (Windows, macOS) | Free | Extremely user-friendly, great for short-form content, good effects/music library. | Less advanced features than professional NLEs, mobile-first design. | Beginners, social media creators, quick edits. |
| Adobe Premiere Pro | Windows, macOS | Subscription ($20. 99/month) | Industry standard, integrates with other Adobe apps, extensive features. | Subscription cost, can be overwhelming for new users. | Professionals, those in the Adobe ecosystem, anyone needing comprehensive tools. |
| Final Cut Pro | macOS only | $299. 99 (one-time) | Optimized for Apple hardware, fast rendering, intuitive interface for Mac users. | Mac only, specific workflow. | Mac users seeking a powerful, streamlined editor. |
Essential Editing Techniques
These are the core skills you’ll use in every video.
- Trimming and Cutting: Remove dead air, mistakes. Unnecessary footage. Keep your video concise and engaging.
- Transitions: Use sparingly. Simple cuts are often best. Dissolves or fades can be used for scene changes.
- Text Overlays (Lower Thirds, Titles): Add context, emphasize points, or introduce speakers. Ensure readability.
- B-roll Integration: Overlay relevant footage (B-roll) over your main narration to illustrate points and keep visuals interesting. For example, if you’re talking about setting up a camera, show a quick clip of you doing it.
Color Correction and Grading
This process adjusts the colors and brightness of your footage to make it look consistent and visually appealing.
- Color Correction: Fixing white balance, exposure. Contrast to make colors look natural and accurate.
- Color Grading: Applying a specific artistic style or “look” (e. G. , cinematic, vibrant, desaturated).
Audio Editing and Mixing
Just as crucial as video, clean audio is crucial.
- Noise Reduction: Remove hums, static, or background noise using built-in software tools or plugins.
- Equalization (EQ): Adjust frequencies to make voices clearer or remove muddiness.
- Compression: Reduces the dynamic range of audio, making quiet parts louder and loud parts quieter, resulting in a more consistent volume.
- Volume Levels: Ensure your voiceover, background music. Sound effects are balanced and easy to hear. Voice should be dominant.
Music and Sound Effects (SFX)
These elements enhance the mood and impact of your video.
- Royalty-Free Music: Always use music you have the rights to. YouTube’s Audio Library, Epidemic Sound. Artlist are popular sources.
- Match the Mood: Choose music that complements your content. Upbeat for tutorials, serious for documentaries.
- Sound Effects: Use SFX to emphasize actions, transitions, or comedic moments.
Export Settings for YouTube
Exporting with the correct settings ensures your video looks its best on the platform.
- Resolution: Aim for 1080p (1920×1080) or 4K (3840×2160) if your footage allows.
- Frame Rate: Export at the same frame rate you recorded at (e. G. , 24fps, 30fps, 60fps).
- Codec: H. 264 is the most common and recommended codec for YouTube.
- Bitrate: Higher bitrate means better quality but larger file size. YouTube recommends specific bitrates for different resolutions and frame rates. For 1080p @ 30fps, 8-12 Mbps is generally good.
Example of export settings in a typical editor:
Format: H. 264
Preset: YouTube 1080p HD (or 4K)
Resolution: 1920x1080 (or 3840x2160)
Frame Rate: 29. 97 fps (or 23. 976, 59. 94)
Target Bitrate: VBR, 1 Pass, 10-12 Mbps (for 1080p)
Audio Format: AAC
Audio Bitrate: 192 kbps
Optimizing for YouTube: Maximizing Discoverability
Uploading your video is just the beginning. Optimizing it for YouTube’s algorithm and your audience is crucial for reach and engagement. This is a key part of any effective video content creation tutorial for YouTube.
Designing a Click-Worthy Thumbnail
Your thumbnail is often the first thing people see. It needs to stand out and accurately represent your video.
- High Resolution: YouTube recommends 1280×720 pixels (with a minimum width of 640 pixels).
- Clear and Bold Imagery: Use a compelling still from your video or a custom graphic.
- Legible Text: Use large, clear fonts that are easy to read even on a small screen.
- Emotional Expression: If you’re in the video, show emotion that relates to the content.
- Consistency: Develop a consistent style for your thumbnails to build brand recognition.
- Real-world example: Look at successful channels in your niche. Notice how they use bold colors, clear faces. Concise text to grab attention. A strong thumbnail can significantly impact your Click-Through Rate (CTR).
Crafting Compelling Titles and Descriptions
These elements tell YouTube and your audience what your video is about.
-
Titles:
- Keyword-Rich: Include your primary keyword (e. G. , “YouTube video creation tutorial”) naturally at the beginning if possible.
- Compelling: Make it catchy and intriguing. Use numbers, questions, or strong adjectives.
- Concise: Aim for around 60-70 characters to avoid truncation on search results.
-
Descriptions:
- First Few Lines Matter: The first 2-3 lines are what viewers see before clicking “show more.” Make them count.
- Detailed Summary: Provide a comprehensive summary of your video’s content.
- Keywords: Sprinkle relevant keywords naturally throughout the description.
- Timestamps: Add timestamps for different sections of your video. This enhances user experience and can improve SEO.
- Links: Include links to your social media, website, or relevant resources.
- Call to Action: Remind viewers to subscribe, like, or comment.
Utilizing Tags and Hashtags
Tags help YouTube comprehend your video’s content and can aid discoverability.
- Relevant Tags: Use a mix of broad and specific tags related to your video. Think about what people might search for.
- Long-Tail Keywords: Include phrases like “how to edit YouTube videos for beginners” as tags.
- Hashtags: Include 3-5 relevant hashtags in your description. These are clickable and can help users find your content through hashtag searches.
Adding End Screens and Cards
These YouTube features help keep viewers on your channel and encourage engagement.
- End Screens: Appear in the last 5-20 seconds of your video. Use them to link to other videos, playlists, your subscribe button, or an external website.
- Cards: Small clickable pop-ups that appear during your video, linking to other content or external sites. Use them to provide context or direct viewers to related videos as you mention them.
Creating Subtitles and Closed Captions
Accessibility is key. Subtitles broaden your audience reach.
- Automatic Captions: YouTube generates these. They often require editing for accuracy.
- Manual Upload: Create and upload your own. Srt file for perfect accuracy. This is highly recommended for any professional video content creation tutorial for YouTube.
- Benefits: Reaches hearing-impaired viewers, non-native English speakers. Those watching without sound (e. G. , on public transport). Improves SEO as YouTube can crawl the text.
Promotion and Distribution: Getting Your Video Seen
Creating a great video is only half the battle; the other half is ensuring it reaches your target audience. Effective promotion is vital for growth.
Sharing on Social Media Platforms
Amplify your reach by sharing your video across your social media channels.
- Tailor Content: Don’t just paste a YouTube link. Create native content for each platform (e. G. , a short teaser clip for Instagram/TikTok, a relevant question for Twitter, a detailed post for Facebook/LinkedIn).
- Engage with Your Audience: Respond to comments, ask questions. Encourage sharing.
- Use Relevant Hashtags: Research trending hashtags on each platform to increase visibility.
Community Engagement on YouTube
Build a loyal audience by interacting with your viewers.
- Respond to Comments: Acknowledge and reply to comments on your videos. This shows you value your audience.
- Ask for Feedback: Encourage viewers to share their thoughts and ideas for future videos.
- Polls and Community Tab: Use YouTube’s community tab to engage with your subscribers between video uploads, ask questions, or share updates.
- Go Live: Host Q&A sessions or behind-the-scenes streams to connect directly with your audience.
Cross-Promotion and Collaborations
Expand your reach by leveraging other channels and creators.
- Collaborate with Other Creators: Partner with YouTubers in your niche (or a complementary one) to create content together. This exposes your channel to their audience and vice-versa.
- Promote on Your Website/Blog: Embed your YouTube videos directly into relevant blog posts or pages on your website. This drives traffic from your site to your channel.
- Email List: If you have an email newsletter, announce new video uploads to your subscribers.
Analyzing Performance and Iteration: Learning and Growing
The final, ongoing stage of your video content creation tutorial for YouTube journey is to interpret how your videos are performing and use that data to improve.
Understanding YouTube Analytics
YouTube Studio provides a wealth of data about your videos and audience.
- Overview: See high-level metrics like views, watch time, subscribers gained. Estimated revenue.
- Reach: comprehend how viewers found your video (e. G. , YouTube search, suggested videos, external sources). Key metrics here are Impressions, Click-Through Rate (CTR). Views from Impressions.
- Engagement: Discover how long people are watching (Audience Retention), likes, dislikes. Comments.
- Audience: Learn about your viewers’ demographics, geographic locations. What other channels they watch.
Key Metrics to Monitor
Focus on these metrics to gauge your video’s success and identify areas for improvement.
- Watch Time: The total accumulated time viewers spend watching your videos. This is a primary ranking factor for YouTube. Longer watch times signal engaging content.
- Audience Retention: A graph showing at what points viewers drop off. A significant drop at the beginning might indicate a poor hook, while drops throughout could mean pacing issues or uninteresting content segments.
- Click-Through Rate (CTR): The percentage of people who clicked on your video after seeing its thumbnail and title. A high CTR indicates a compelling thumbnail and title.
- Traffic Sources: Where are your views coming from? This helps you interpret what promotion strategies are working and where to focus your SEO efforts.
Iterating and Improving Your Content
Data is only useful if you act on it. Use your analytics to refine your strategy.
- What Worked? Identify videos with high watch time and CTR. What made them successful? Can you replicate those elements?
- What Didn’t Work? review videos with low performance. Was the topic uninteresting? Was the audio poor? Was the thumbnail misleading?
- Listen to Your Audience: Pay attention to comments and direct feedback. Viewers often tell you exactly what they want or what problems they encountered.
- Experiment: Don’t be afraid to try new formats, editing styles, or topics based on your insights. Every video is an opportunity to learn and improve your next video content creation tutorial for YouTube.
Conclusion
You’ve now navigated the entire journey of YouTube video creation, from concept ideation to the final upload. Remember, the true learning begins after your first video goes live. Don’t be afraid to experiment, especially with current trends like the pervasive rise of YouTube Shorts; mastering concise, engaging hooks is paramount for capturing attention in today’s fast-paced digital landscape. My personal tip, from countless hours spent in the editing bay, is to prioritize consistent output over initial perfection. My early videos were far from polished. Each upload taught me something invaluable about audience retention and pacing. The YouTube landscape is constantly evolving, with recent developments pushing creators towards authentic engagement and community building. Focus on delivering genuine value, even if it’s just a simple “how-to” on a niche topic. Your unique voice is your most powerful tool. So, hit record, embrace the learning curve. Know that every single upload is a step towards mastering your craft and connecting with your audience. The world is ready for your story.
More Articles
Unlock Your Creativity with These Free Content Tools
Overcome Content Challenges with Smart Solutions
The Next Big Things in Content Creation to Master Now
Boost Productivity with a Smarter Content Workflow
Build Your Perfect Content Calendar Template Easily
FAQs
What exactly does this tutorial cover?
This tutorial takes you through every single step of creating a YouTube video, from brainstorming ideas and scripting to filming, editing, uploading. Even optimizing for views. It’s designed to be a complete A-Z guide for anyone looking to start or improve their YouTube presence.
Is this tutorial suitable for total beginners?
Absolutely! We designed it with beginners in mind, breaking down complex topics into easy-to-interpret steps. Even if you’ve never touched a camera or editing software, you’ll be able to follow along and start creating your own videos.
Do I need fancy gear to get started?
Not at all! While we discuss professional setups, the tutorial also shows you how to create high-quality videos using just your smartphone and readily available tools. It’s all about making the most of what you have and achieving great results on a budget.
How long does it take to complete the entire tutorial?
The tutorial is self-paced, so you can go as fast or as slow as you like. It’s broken down into modules, allowing you to learn at your own convenience. The core content involves several hours of video lessons, plus time for you to practice and apply what you’ve learned.
Does it include video editing instructions?
Yes, detailed video editing is a major part of the tutorial! We cover popular software, essential techniques. Tips for making your footage look professional and engaging, even if you’re new to editing. You’ll learn how to cut, add music, text. Much more.
Will this tutorial also teach me how to get more views or subscribers?
While the primary focus is on the creation process itself, we do dedicate sections to best practices for optimizing your videos for discovery and engaging your audience, which naturally contributes to channel growth. It’s about setting you up for success from the ground up.
Is good audio covered, or just video?
Absolutely! We dedicate significant time to audio because it’s just as crucial as video for professional-looking content. You’ll learn about microphone choices, recording techniques. How to improve your sound quality in post-production, ensuring your message is heard loud and clear.